

Reefer Container Recommendations for Reliable Cold Chain Shipping
2026-08-20
Every temperature-sensitive shipment hinges on a single choice: the reefer container. Yet too many teams only realize this after a load of vaccines, seafood, or fresh produce arrives compromised. In this guide, we skip generic advice and deliver reefer container recommendations for reliable cold chain shipping that reflect real-world conditions. Drawing on field-tested insights from Worldbase, you'll find practical ways to match container specs to cargo needs, spot hidden failure points, and build a cold chain that holds from port to final mile.
Why Your Cargo’s Respiration Rate Should Dictate Set Points
A shipment of avocados breathes very differently from a pallet of blueberries, yet many cold chain settings are still pinned to generic temperature bands. Respiration rate—how much oxygen produce consumes and how much heat and CO2 it gives off per unit mass per hour—is the most direct biological clue about the pace of metabolic activity inside the container. If that rate is ignored, the set point becomes a guess rather than a control parameter.
When respiration climbs, the cargo generates its own heat load, which can push pulp temperatures several degrees above the supply air. Ventilation and cooling capacity then need to respond almost in real time; otherwise CO2 pockets and ethylene accumulation accelerate senescence. For example, asparagus can respire at rates high enough that a static 1°C set point with low airflow allows core temperatures to drift toward 5–6°C, enough to trigger lignification and loss of tenderness. Adjusting set points according to measured or estimated respiration helps keep the actual product temperature, not just the air, within a safe window.
Respirational data also gives a better basis for deciding when to step temperatures down after loading, when to raise relative humidity to curb water loss, and when to flush the atmosphere. Instead of relying on fixed protocols, operators can map observed CO2 production to a sliding scale of set points. This kind of feedback loop treats each consignment as a living system, which is exactly what it is, and it sharply reduces the guesswork that leads to shrivel, decay, or internal browning.
Pre-Cooling the Container Before Loading Prevents Silent Failures
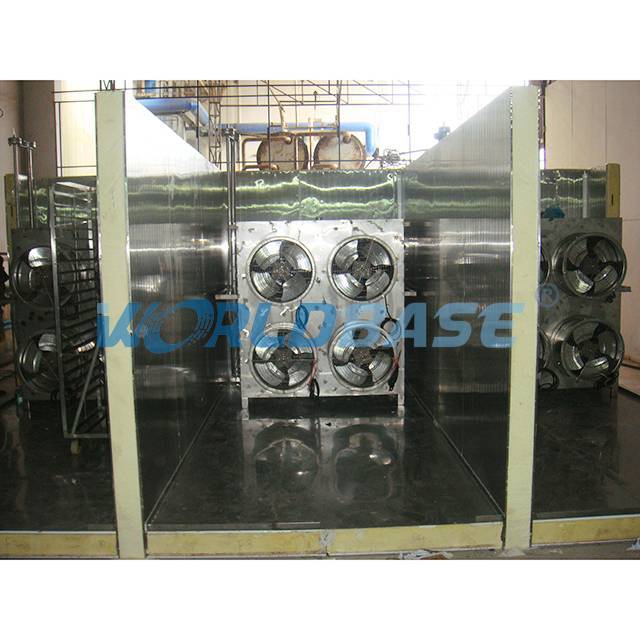
Many drivers and warehouse crews treat pre-cooling as a box to tick—set the unit, watch the display drop, and open the doors. That reading only reflects air temperature near the sensor, not the heat still trapped in the container floor, walls, and air pockets behind pallets. If you load at that point, the product immediately absorbs that residual heat. The reefer then runs flat-out to pull temperature down, often for hours. Under that load, the evaporator coil can ice up unevenly, airflow drops in the nose or along the floor channels, and warm pockets form. The alarm never sounds because the return air sensor still sees an average temperature that looks acceptable. That's the silent part of the failure.
Pre-cooling also acts as a mock load test for the unit itself. A reefer that cools an empty box may still have a weak compressor, low refrigerant, or a failing expansion valve that only shows up under sustained heat removal. If you pre-cool properly and watch the pull-down time and the gap between supply and return air, you catch these issues before the cargo is inside. Once the box is loaded, you lose the chance to fix or swap the unit without risking the entire shipment. Even a partially clogged condenser or a slightly off calibration of the controller can mask itself during no-load operation and then quietly kill a load of high-value produce or pharmaceuticals.
A practical pre-cool sequence is to close the doors, set the unit to the product's required carrying temperature, and let it run until the return air reading has been stable for at least 30 minutes—not just until it first hits the setpoint. Then keep the doors shut until the very last moment before loading. If you open them early while staging pallets, a rush of humid dock air undoes much of the work and can frost the coil before the first carton enters. Pair the pre-cool with a fast, well-rehearsed loading procedure and, where possible, use strip curtains at the door. That is how you turn a routine pre-trip step into real protection against failures that never trigger an alarm.
Airflow and Humidity Settings That Keep Mixed Perishables Safe
The real challenge with mixed perishables isn't just temperature—it's how air moves and how much moisture hangs in it. Too little airflow lets ethylene from apples or avocados pool around leafy greens, speeding up decay. Too much, and delicate herbs or berries lose surface moisture and shrivel. The solution is to create a gentle, consistent circulation that breaks up still pockets without blasting produce directly. Aim for a subtle wash of air that reaches the center of each bin, not just the perimeter.
Humidity is the quieter partner in this equation. Most mixed storage bins default to a one-size-fits-all setting, but leafy greens want 90–95% relative humidity while onions or garlic need it closer to 65–70%. The fix isn't to chase an average—it's to separate high-moisture items into crisper drawers or use perforated containers that bleed off excess humidity for the drier-tolerant produce. Without this split, you either rot the lettuce or desiccate the peppers.
One overlooked trick is to position ethylene emitters like tomatoes or melons near the return air vent. That way the gas gets pulled into the cooling system's active carbon or ozone filter before it reaches sensitive items like broccoli or cut flowers. Pair this with a humidity controller that cycles the evaporator fan at a lower speed for longer intervals, and you end up with a stable microclimate that keeps a mixed load in good shape for days longer than any default setting would allow.
Sensor Placement: Where to Put Probes for Honest Temperature Reads
A probe wedged against a heat sink, a wall, or a window will never tell you what the air is actually doing. Pull it back a few inches—or a foot—so it sits in the path of airflow without touching anything solid. In rooms, that usually means waist height on an interior wall, away from vents, doorways, and direct sun. If you are measuring outdoor temperature, shade the sensor and keep it off brick or metal, which radiate heat long after the sun goes down.
Placement gets trickier inside enclosures and ductwork. Mount probes mid-stream rather than in dead corners where air stalls. For a server rack, push the sensor toward the front intake, not the exhaust side, if you want the reading that matches the air entering the gear. In a fridge or freezer, suspend the probe near the center shelf—never against the back wall or in the door.
Give each probe a few minutes to settle before you trust the number. A sensor that has been in your pocket or sitting in a warm room will carry its old environment with it. Once the placement is clean and the probe has stabilized, you are reading conditions, not the object next to it.
What to Do the Moment a Reefer Alarm Goes Off Mid-Route
The instant that alarm pierces the hum of the road, your first move isn't to panic—it's to glance at the reefer unit's display and note the code. That blinking number or letter isn't random noise; it's the unit telling you where the system hurts. Whether it's a high-temperature warning, a low-voltage flag, or a sensor fault, reading it correctly sets the tone for everything that follows. Keep a laminated cheat sheet in the cab, not buried in a binder, so you can match the code to the likely cause without fumbling through pages while your cargo sits in rising heat.
Once you know what the unit is complaining about, pull over safely as soon as you can—but don't kill the engine in a panic. A controlled stop on a level shoulder beats a hasty one on a blind curve. Shut down the reefer, wait thirty seconds, and restart it while watching the display. Many alarms are transient: a loose connection, a brief voltage dip, or a door seal that shifted when you hit that pothole. If the alarm clears and the temperature starts trending back to set point, breathe. But if it returns within minutes, it's time to treat it as a real fault, not a false positive. Grab your flashlight and walk the length of the trailer, listening for the compressor, feeling for airflow at the vents, and checking that fuel level—because a reefer starving for diesel will scream just as loudly as one with a dead sensor.
Your next call isn't to your dispatcher for permission; it's to the closest service provider or your fleet's emergency line, armed with the exact code, the unit model, and the current box temperature. Don't guess or swap parts on the side of the road unless you're certified and have the right tools—reefer systems punish improvisation. If the temperature is climbing fast and you've got perishables, start planning your mitigation now: can you transfer to another trailer, add dry ice, or reroute to a cold storage within an hour? Every minute you spend debating the next step is a minute the load edges closer to a claim. Know your load's temperature tolerance before the trip starts, and write down the critical limit on your manifest—not on a sticky note that'll fall off.
Managing Moisture Build-Up From Door Breaks and Defrost Cycles
Frequent door openings and defrost cycles pull warm, humid air into the cabinet, which condenses on cold surfaces and eventually pools at the bottom. The first step is to check that door gaskets seat fully along all edges; even a small gap lets moisture enter continuously. Also confirm the door self-closes with enough force to prevent accidental ajar periods after staff pass through.
Defrost water needs a clear path. Inspect the drain line for debris, slime, or ice plugs, and flush it with warm water if flow is slow. Keep the drain trap filled to stop air from being drawn back into the cabinet during the refrigeration cycle. If moisture still collects under lower shelves or bins, adjust the door heater setting or install a strip curtain to reduce the volume of humid air entering during busy periods.
FAQ
Confirm the unit's last pre-trip inspection date, verify that the controller is calibrated within the last 90 days, and make sure the cargo's required temperature and ventilation settings match the container's capabilities. Also check for any visible door seal damage before loading.
Pre-cool the empty container to the cargo's target temperature for at least one hour before loading. This prevents warm walls and flooring from pulling heat out of the produce or pharmaceuticals during the first hours of transit, which is when most temperature excursions begin.
Leafy greens usually hold well around 0°C to 2°C, berries near 0°C, citrus between 4°C and 8°C depending on variety, and tropical fruit like bananas around 13°C to 14°C. Always check the shipper's specific protocol because even one degree can trigger chilling injury or accelerated ripening.
Airflow removes heat and gases produced by respiring cargo. Keep the load off the floor with pallets, leave space between cartons and the walls, and never block the air chute at the front. Poor airflow leads to hot spots, condensation, and uneven ripening.
Place a calibrated data logger in the center of the cargo stack and one near the door. They record actual conditions during transit, which helps you spot brief door openings, refrigeration faults, or poor loading patterns before they cause a full rejection.
Clean condenser coils at every depot handoff, check refrigerant levels during pre-trip inspection, and replace worn door gaskets immediately. A simple coil blockage can cut cooling capacity by 30% without triggering an alarm.
It pays off for long-haul shipments of highly respiring produce like avocados or stone fruit, especially when transit exceeds 21 days. Lower oxygen and higher carbon dioxide slow ripening and reduce decay, but the benefit shrinks on short routes where standard ventilation is sufficient.
Conclusion
Starting with the container itself, pre-cooling before loading is not a luxury but a safeguard against the slow warming that ruins cargo hours later. The set point should follow the product's respiration rate—high-respiration items like broccoli need colder air than apples, and a one-size-fits-all temperature invites spoilage. Airflow and humidity demand equal attention: too much dry air desiccates leafy greens, while stagnant moist pockets rot berries. Balancing fans and vents for mixed loads keeps every pallet breathing without cross-contamination.
Sensor placement decides whether your temperature data is honest or just comforting. Probes belong near the return air, at the door, and inside product stacks—never on the floor or against metal walls. When an alarm trips mid-route, the first move is to read supply and return air simultaneously; a widening gap usually signals airflow blockage or a failing compressor, not a false reading. Moisture management after door breaks or defrost cycles is also critical: wipe down condensation, reseal quickly, and set defrost intervals short enough to avoid frost buildup but long enough to shed excess water without re-freezing on cargo.
Contact Us
Contact Person: Mr Yang
Email: [email protected]
Tel/WhatsApp: +8613809083091
Website: https://en.worldbase.cn